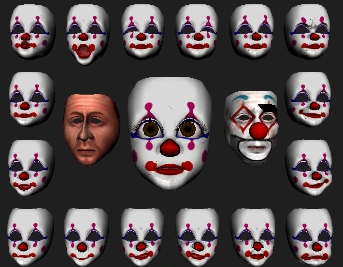
 figure 2.
In order to get realistic facial expressions,
we had to create a realistic face. In the center of the screen you
can see the base version of the balloon girl's head. To her left
is Dave's base head and to her right is Pinhead's base head. Around
the border are 16 different versions of the Balloon Girl's head.
Each of the heads contains one facial muscle fully flexed. We then
blended between each of the facial muscles and the base head to generate
the different facial expressions.
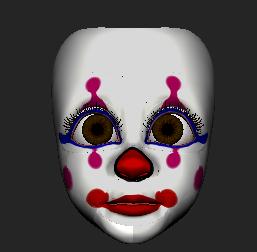 figure 3.
You can see that we have full control over
the character's expressions because we have the ability to flex any of
the facial muscles by simply dragging a slider. We are not limited
by preset "Happy" or "Sad" expressions.
|
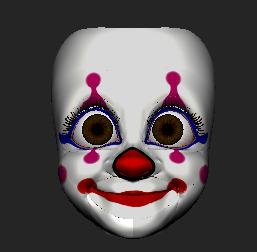
figure 4. |
|
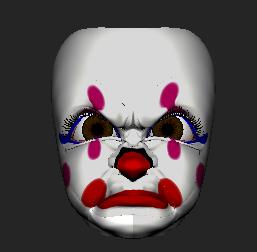
figure 5. |
Once we had the character's facial structure
setup, we started to animate her. Here we have a an animated version
of the Balloon Girl's face. Animation was made easy in Maya thanks
to powerful tools such as the Timeline. You can see that I've just
displayed a sound in the Timeline. As I scrub in the Timeline, I
can hear the sound file. But not only can I hear the sound, I can
see it in the form of a waveform. Being able to see my sound file
helps me more precisely set my keyframes and visually see when a sound
starts and stops, and how loud it is.
One of the great advantages in using this facial
muscle technique was that Dave and Pinhead both shared the same geometric
topology as the Balloon Girl. What this means is that all of the
facial muscles that we modeled for the Balloon Girl can apply seemlessly
to the other characters. By simply draging a slider, I can change
the character from the Balloon Girl to Dave or Pinhead and all of the animation,
all of the facial muscles simply start to work with the different characters.
This saved us alot of time and gave us alot of flexibility because we could
quickly model new characters without having to model new facial muscles.
One of the challenges we faced while working on Bingo was that the character's heads were made up of 18 different surfaces. While this gave us alot of flexibility and control in the modeling of the heads, it posed a difficult and common problem, how do you keep the surfaces looking seemless? To keep the character's faces seemless we used a tool in Maya called "stitch". What "stitch" allowed us to do was ensure that our surfaces remained seemless even during the most complex deformations.
|

figure 6. |
|
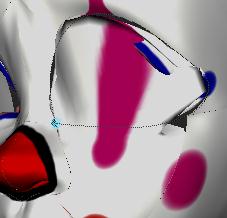
figure 7. |
|
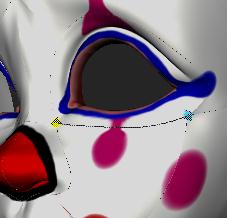
figure 8. |